Monday, September 26, 2016

New Craft- Natural Dyes & Printing with Plants


I am having so much fun!!  This is a totally new direction for me and it is just plain magical.  Working with natural dyes and printing with plants......who knew ??  

A dear friend of mine, who is an amazing fiber artist, sponsored a workshop at the Oregon Coast with Pia Best-Reignhaus and I signed up.  This was possibly a misjudgment  on my part due to the fact that I have never had ANY experience with dying and the workshop was a Master's Class, but I made it through, learned a lot and am now in the process of going back and learning the basics.

The picture to above is part of what we learned in class using indigo, rust and plant materials....beautiful and interesting results.

It was a great workshop.  The weather at the coast was perfect (although a little windy) and the projects were very successful.

After the 5 day workshop, I went home and started experimenting on my own creating dyes from things in the kitchen, like celery leaves, carrot tops, onion skins, avocado pits, artichoke water and red cabbage.  The results were better than I expected. 

I have been collecting all sorts of leaves to used for the printing process and that has been an adventure as too.  I now travel with a pair of clippers with me at all times, just in case.  Slowly, I am getting to know what leaves print well that grow in our yard and the surrounding neighborhood.  
this was dyed with celery leaves and printed with Sweet Gum, Eucalyptus and Smoke Bush leaves  The celery gave it a "yellow green" color, the iron I used as a mordant shifted the color to a mossy green.
this scarf was dyed with Logwood, which I purchased from Dharma Trading, and it was printed with rose leaves from our yard, wild rose leaves, also from our yard, Eucalyptus and Smoke Bush"fuzz".  This scarf goes perfectly with a particular outfit in my closet....so I think it is going to stay in my personal collection.  So far I have only purchased Logwood and Indigo, everything else has been from Farmer's Market!
You never know what is going to happen and there is anticipation overtime you unbundle a project.  This silk charmeuse scarf was printed with some large leaf maple leaves and they gave up the most beautiful green and the prints were very clear.

So I am totally hooked on the process.  A dye studio is in the process of being set up on the back deck and I have taken over part of my husband's shop for my steamer and spinner...that's where the deep sink is.  Drying racks are now set up outside and there are all sorts of buckets and pots that have been collected from junk stores and Goodwill.  Leaves are being collected and flattened to be stored for use in the Winter to come....it's all very exciting.   I am pretty sure I know what the ladies in our family will be getting for Christmas.  Shhhhh, don't tell.

My plan is to add scarfs to my website www.margaretjoyceart.com in the near future.  So, that's what is new in my world.  I leave you with some pictures taken at the workshop, perhaps you will be inspired too.

Enjoy,
Margaret

Sunday, March 27, 2016

Easter walk at Oak's Bottom


Spring is here!  Look at the color

Today is Easter Sunday.  The sky looks a little overcast and it's cool outside but every now and then the sun breaks out through the cloud cover and it gets warm and bright.  My husband and I decided to go for a walk somewhere other than our usual stroll in the neighborhood.  We decided to go to Oak's Bottom Trail which is a lovely nature walk around a bird refuge.  It's a pretty easy walk but it does have some irregular terrain, so it's not all flat and since it is a protected bird refuge, there usually is something interesting to see.   Also, it is connected to the Spring Water Trail so you can walk all the way along the river into Portland if you want a big workout.  We like the nature trail the best because you do not have to share it with people on bicycles ....an occasional runner...maybe.

We parked in the neighborhood just above the beginning of the trail and walked down toward the river on the path that runs alongside the historic Sellwood Church.  The Rhodie pictured above was growing beside the church.

So many different plants are putting out their Spring blooms.  No wonder so many friends are struggling with itchy eyes and stuffy noses!

We have had lots of rain and everything has a sparkly, lush look to it.  The greens are all light "Spring Greens.  New leaves just coming out all fresh and bright.


,

We were having a good time, enjoying the walk,
watching for birds, and taking pictures for fun.

AND THEN WE FOUND THIS!!!!!

Looks like the Easter Bunny has been walking along the trail too!
love where these are "hidden"
Bright colored plastic eggs carefully placed in amongst the green along the trail.  What Fun!  We had a great time walking along and finding them.  How wonderful that someone thought to buy eggs, fill them with treasures (yes, we checked them out) and left them along a nature trail for people to find.  They were pretty easy to spot, but some of them were cleverly tucked in places that were not so obvious.  We enjoyed the challenge but left them there for others to find.....hopefully, some kids.
Hot pink among the green
The Oak's Bottom trail runs along the base of a hillside and so it is out of the wind that is pretty strong in that area along the river and the Spring Water Trail.  There is a lot to take in and if you are observant you might see all kinds of things.  We have seen many of the birds that live there, all kinds ducks, herons, eagles and osprey.  I understand there are beavers there too, but we haven't yet spotted any.
This is the view from the observation platform on the trail.  All the tall grass that is choking the waterways, unfortunately, is purple strife.  It has a beautiful purple bloom later in the year, but even though it is beautiful, it is an invasive species and seems to be ever expanding into what should be open water.  The water birds seem to like it though.  It does give them cover and is probably a great hunting ground.
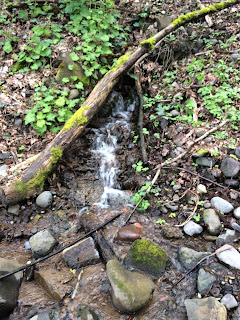
The lake is fed by lots of water coming off the hillside...like this little spring.  The park service has built walkways up an over most of the really wet boggy places so it is easier to walk the trail and not get all muddy.
AHA!!!  We found our Easter Bunny!!!  This young man with his basket of eggs was out accompanied by his Grandmother and her dog.  He was busy carefully putting eggs out along the trail.  I don't know how many he had, but we spotted a lot on our walk.

This was a fun group of people walking the trail.  I believe the lady on the left is the Grandmother of our Easter Bunny.  All these folks had little dogs and the dogs seemed very happy to be able to romp with other of their own kind/size.

look at these little guys (the dogs)

So, all in all, we had a great day.  We did finally see  some kids with arms loaded with collected eggs.  I am sure that if they had known they would be finding eggs, they would have brought baskets with them.  Their parents were trying to convince them to leave some for other people to find.

Raph picked up an egg for a souvenir

Inside was this: "Nature does not hurry, yet everything is accomplished." -Lao Tzu

(and a pink puffy chick)

HOPE YOU  ALL HAVE A WONDERFUL EASTER
love, 
Margaret

Friday, March 25, 2016

Needle Felting a pet for an American Girl Doll

A Basset Hound for Kit

Meet "Molly" my newest  needle felted creation.  She turned out really cute and my grand daughter, Aria, is pretty happy with her and so am I.

Why Molly was created::

Before Christmas The American Girl company opened up an American Girl pop-up store in downtown Portland, Oregon and my daughter-in-law, granddaughter and I went together on the new MAX line to check it out and do some shopping.  Aria had saved her own money and had a shopping list of accessories for her doll Kit that she was hoping to be able to buy at the store.

If you are not familiar with American Girl Dolls.....let me tell you...they have quite the following and have been around long enough to have generations of enthusiasts.  Older, special edition dolls are highly collectable.

 The dolls are very well made and have the most amazing accessories to go with them.  You can have a doll that looks like you, hair color, eye color, glasses, dental head gear, or even a wheelchair.  Every year there is a special edition collectable doll and there are also "Forever" dolls that represent different girls from American history and ethnicity and come with their own book that tells their story.   All the dolls are very expensive and the cost of all the wonderful little things that go with them adds up FAST!!!! The quality, however, is very high and the attention to all the little details is amazing.

The American Girl pop-store was at Pioneer Square in downtown Portland and the MAX dropped us off right in front of the store.  The store was filled with little girls clutching their dolls with their moms and grandmothers so we fit right in.

Aria has four American Girl Dolls.  One of which she purchased with her own money....Kit.  Kit is a "Forever" doll who is a girl reporter from the 1930's era.  Aria was wanting to buy Kit's camera and  typewriter sets and she did ...with her own money.  Her mom and I proceeded to pick out things for Kit too (and things for Aria's other dolls as well).  Aria made quite a haul that day and was so excited to get back to the house and play with everything.

Back to needle felting::

The doll Kit has a pet Basset Hound and there was one in the store.  It was a basic, simple little stuffed animal that cost quite a bit for what it was.  I said "Grandma can make you a better one".
So,  I have finally done it and made good my promise.


Here's Aria with Kit and Molly.....and a big smile.   Molly turned out really well but needed accessories of her own, so I made a dog bed, with a pillow and Aria put a "M" on it,  I made a bone (every dog should have one) and Aria made a ball so Molly would have a toy too.
Molly the Basset Hound with bed, bone and ball.


Here's that beautiful smile again.  I think she is really happy with how everything worked out.  We chose the purple/ off-red color combination because Aria was not sure if the dog should be male of female.  She settled on the name Molly....so  IT"S A GIRL"

Molly has sewn in glass eyes, short wrinkled legs and very big feet.  I made a wire armature first and felted the figure in all white around the armature in order to give the figure stability and keep the proportions right.  There is pink on the inside of the ears and two shades of brown with black roving that overlays the white body to create the markings.

Because the figure was felted over a wire armature it is slightly posable....especially the tail.  The whole project took about 5 hours.


Here's a picture of Kit in her bed with her look-alike mini doll (yes, even the dolls have dolls!) and her faithful Basset Hound, Molly in her very own bed with bone
and ball.   So Cute!


Happiness is ...spending time together & creating together....most of all....making memories together

Hope Life is being sweet to you and may all your creations bring smiles as great as this one.

Love to all,
Margaret

Thursday, February 25, 2016

Art at Grandma & Grandpa's house

My husband and I are both artists and we are so blessed and sooooo very lucky to be at a place in our lives where it all has come together.  We are, as we call it,  "semi-retired", which means we are still working but not at full-time mainstream jobs.  We have a studio attached to our house that is full of light and all the supplies we might need at our fingertips.  It is our creative sanctuary, a place where we can, and do, create messes and it doesn't matter, we just let the creative juices flow....we can just shut the door and go back to it the next morning....We Love It!!

 Our primary blessing is time....time to do what we want, that allows us to explore our own creativity also be able to spend time with our grandchildren helping them to explore their creativity when they come to visit.  At our house we can -do fiber arts-create sacred objects (Goddess Eggs)- color pencil-airbrush-fused glass- painted fused glass -oil paint-pastels- jewelry making/beading-woodworking.....a wonderland of art.

This past week we have had the joy of a visit by our grand daughter, Ahshayla, who is 10 years old, and, of course, she wanted to do art.  She definitely had an agenda....create an egg for her daddy and learn how to draw faces.  I took up the "create an egg" assignment and Papa Raffy was assigned the "draw a face" lesson.

To make an egg with a child is an interesting process.  First step is to choose an appropriate egg.  I generally like the to use a goose egg.  It's a nice big size that is easy for a small hand to hold.  The eggs at the top of this picture are goose eggs.  Look how small they look next to the ostrich and emu eggs underneath them!!  The really big eggs like ostrich and emu, take way to many stones an are really to big for children to handle easily.

Next, we pick out the stones and rhinestones that we will be using.  This is pretty difficult and takes some time because kids want to use a little bit (or a lot) of everything.  Also, since we try and coordinate the gems with the color of the egg....editing is required.

Here is Ahshayla painting her egg.  She decided on a metallic blue egg with silver accents.  She chose Peacock Rock, blue chaton rhinestones and AB flatback Swarovski rhinestones for a super sparkly hit.

She did a very nice job painting the egg.  The hardest part of the painting process is waiting for the paint to dry between coats and making sure it is dry enough before going to the next step.

 While waiting for the paint to dry Ahshayla would head straight to Papa Raffy (aka grandpa) to make sure he was going to be available for an art lesson on drawing faces as soon as the egg was complete.  I think she was making sure he would be ready and not get into another project and perhaps put her off.....HA!  like that would happen!


  She did prayers that went inside and she chose a white glittery little flying dove to go into the center of the egg to represent Peace and Love.  At long last her gift for her daddy was complete.  She was very happy with how it turned out.  I think she did a great job.
Finished egg...Blue goose egg set with peacock rock and rhinestones
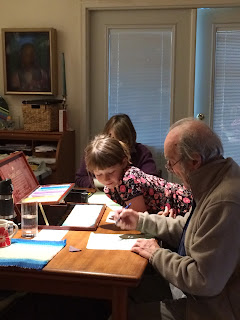
Now it was grandpa's turn to continue with the creativity and his "draw faces" lesson.  I got out all the paper needed and my big set of color pencils.  They set up for the lesson on the kitchen table because although we have a large studio...it is currently filled with glass for a big church widow painting job that Raphael is working on.
Raph is a very good teacher.  He is patient and very clear with his directions.  It helps that all our grandchildren are very good listeners too.  (they are perfect you know).  Anyway, he carefully explained how to figure out where eyes go, how far apart they should be, where the nose begins and ends, how big ears really are and where they should be placed, how far up on the forehead eyebrows are and where shadows show up on the planes of a face.  Ahshayla took it all in and, hopefully, will remember it, but if not, there will be more art lessons in the future.

The head you see in the background is me working on my own little drawing.

My daughter, Ahshayla's mother, decided we needed a snack
and made popcorn which was greatly appreciated.  She makes the best popcorn EVER.  We loved it until the black paper came out and greasy fingers became a problem.


following grandpa's directions
As you can see, she is doing pretty well.  It is so much fun to watch as things start to come together for them.  Like most children, she didn't really think she could draw anything as good as grandpa's, but the reality is....he is in his 70's and has been an artist his whole life...practice-practice-practice- he did not have a parent or grandparent to help when he was as young like her.  He did go to an Art High School in New York City where he grew up.  That's something most of us do not have an opportunity to do.   He is a professional artist that has made his living with his art all his life.  Extraordinary!

None of our grandchildren may grow up to be professional artists, but they can have the amazing experience and freedom to learn about art and explore their creativity with different mediums in our  house/studio with us there to provide the materials and the guidance.  What a gift for us to be able to spend that kind of time with them,  That's the biggest blessing of all.

Grandpa's drawing
Ahshayla's drawing
 Ahshayla's drawing is real, fresh and exciting.  She followed his directions and, I think, learned a great deal.  For certain, we all had a great time together.
art lesson with Papa Raffy (aka grandpa)


FUN FUN FUN!!!!!!!!!!!!!!!  Love to all


Monday, January 25, 2016

GODDESS Needle Felting Tutorial


Bevy of needle felted Goddesses

I love needle felting Goddesses.  These lovely ladies are soft, sweet, feel nice in your hand and hold  blessing and prayers intended to facilitate connection to your highest expression of self.  Inside each Goddess there is a pinch of lavender for sweetness,  rose petals for beauty, a piece of snake skin for transformation and a tobacco prayer.

"Grandmother, nurture me.  Grandfather, empower me.  May I be held in the embrace of All That Is, protected and supported, living a life of joy, health, prosperity, piece and love."

To start with, everything is smudged (passed through smoke from burning sage) to purify and clear. It also helps me to focus and move into the state of consciousness needed to create a sacred object.  The goddesses are created as sacred objects that are intended to be placed on a personal altar or perhaps used instead of a "talking stick" at a women's circle.  


Things to go into the Goddess and the White Sage smudge


The next step is to take a little bit of wool, smudge it, and place a pinch of lavender, rose petals, a little piece of snake skin (optional) or whatever you might like to put in your Goddess onto the wool and finally, the tobacco holding your prayer or intention.  The wool is then folded around the items and needled into a roundish packet.  This little packet of energy will be put inside the Goddess.  I try and get it around where her tummy will be if possible.
 Now we start forming the body shape of the Goddess. which is basically somewhat off a cone shape.  I wind the roving around itself creating the cone shape....until it is about 4-5 inches in length and 2-3 inches in circumference at the top and going to a fat point at the opposite end.  Needle the wool a little bit so it will hold it's shape and won't come apart.  Once you have your basic shape, push the packet with the prayer down into the center of the cone, pull the wool over the top and needle felt the wool on the top until it is no longer open.

This is the basic rough cone shape....don't worry... it will get better...we're just getting started!
Here's the packet going into the cone.  Push is way in...much farther than I am showing here.


Next up...adding a head.  Roll a small amount of wool into a ball and then wrap another piece of wool around it and hold it tight at the base of the ball.  Needle at the base to hold it together and a little bit across the entire circle too.

Now you should have a ball with a fluffy bottom.  It's that fluffy bottom bit that will be the wool that
attaches the head to the body.  


Spread the wool and center the head onto your body shape and needle it in.  Be sure and run the needle through the top of the head into the body and angle the needle all around the base of the head to make sure the head is attached securely .  You can start shaping the shoulders and creating a neck crease at this point.  I keep turning the wool around needling as I go to keep things symmetrical.

Now you need to decide which side is the front and which side is the back.  I usually use the fuller side, if there is one,  for the front.  Once you have decided which is the front, place your needle in the center of the chest and start creating the bust line.

This is a gentle dragging motion as you needle and it creates a line.  Don't put to much pressure on the needle as it can break very easily.
Turn your Goddess over and start flattening the back from the neck down to where her bottom will be.  She is starting to look like a human woman's form now.  YAY!


Now for the arms.  At this point you can choose what position you would like your Goddess's arms to be in.  The Goddess I am making here has her arms over the top of her pregnant tummy but you can have her arms straight down at her sides or under her tummy if you like.  If you have enough wool on the sides of your body shape you can needle the arms in the same way as the breasts were created.  If not,  create the arms by adding wool and needling it into the shape you want.

At this point I usually add some extra wool for her pregnant tummy.    
You can make her tummy as big and round as you want.  It will flatten a bit when we add the spiral

Keep turning her around and needling the wool in fro all angles.  Work on the back to flatten and around her sides to define her waist and hips.  I tend to make my Goddesses very full figured but you can make yours slimmer.  Goddesses come in all shapes, sizes and colors!

Turn her over and using the needle dragging technique, create her bottom cheeks and the line between her legs.  You might need to add wool for the cheeks
You will need a long thin piece of roving to create the spiral on her tummy.  I like to use something that goes from light to dark.  Starting at the center of her tummy anchor the spiral piece and start needling it around in a circle to create the spiral.  Make the spiral big enough to cover her most of her tummy. 


I added some green around the spiral to give it more definition and to plump her tummy up and make it more round.  The end of the spiral goes down between the legs and ends at her feet.

SHE'S ALLMOST DONE!

At this point you could stop if you liked.  The Goddess figure looks very much like an ancient Venus and is quite pleasing.  I, however,  like to give my Goddesses hair.   I use many different colors of curly wool but am most fond of the natural colors.  Some of the Goddesses seem to like color, so you will see red or even green hair on some of them.

I try and place interesting curls and color around the face for interest.  Be sure and needle the wool all over the head to make sure that it is going to be secure.  Once the front is the way you want it, turn her over and do the back as well.  You can add curls anywhere you like and can have her hair as long or as short as you like.  I tend to like my Goddesses with really long hair.  Sometimes I put flowers, beads or headbands on them.  This Goddess is going to get a headband braid.

Using the same wool separate it into three strands, anchor them together at the top on your felting block and make a small braid.  Place it on her head and needle to attach.  Simple and sweet!

Look her all over, check for any places that might need a little more work.

TA DA!!!! Your Goddess is finished and beautiful.

Hope you enjoyed this process.    To see more of my work please check out my website: wwwmargaretjoyceart.com